How To Tell If Reclaimed Wood Is Pressure Treated (3 Ways To Uncover The Truth)


Jim is an environmental professional with 25 years’ experience in the areas of sustainability, management of natural resources, and environmental projects. He’s passionate about creating a world where people and nature can thrive together.
Reclaimed wood is great for the environment and can be even more durable than new wood. Unfortunately, since it’s been reclaimed from old buildings rather than produced in a controlled process at a lumber yard, it can sometimes be difficult to tell if your reclaimed wood is pressure treated or not.
Reclaimed pressure-treated wood has a different hue from regular wood due to the preservative used. It might also retain the smell of the chemical. Most manufacturers will also indicate pressure treatment on the timber or the provided fact sheet.
As good as reclaimed wood can be, it’ll be a wasted investment if it rots within a few years.
Today, I’ll help you avoid that by teaching you how to tell if your wood is pressure-treated. If you’re extra worried about preserving your wood, I’ve thrown in some additional pointers on keeping reclaimed wood looking as good as the day you bought it.
3 Ways To Spot Pressure-Treated Reclaimed Wood
There are a few ways to spot pressure-treated wood. These methods range from straightforward and cheap to expensive and complicated.
Check Manufacturer Labels

The easiest way to spot pressure-treated wood is to check it for manufacturer stamps. Wood, like many other products, is usually vetted by an overarching organization. In the US, wood is inspected by agencies third-party inspection agencies accredited by the Board of Review of the American Lumber Standard Committee (ALSC).
These organizations require companies to identify the wood they sell to consumers. This label might be stamped or tagged on the wood and is usually on all lumber that passes the inspection. Most times, it shows where the wood was produced and what it’s been treated with.
Depending on the preservatives used, you might come across acronyms like the following, which are some of the different chemical treatments used to protect wood from biological degradation and help it to last longer.
- CCA (Chromated Copper Arsenate) – a common preservative used to protect wood from infestation by insects, fungi and rot.
- ACQ (Alkaline Copper Quaternary) – This is a water-based preservative, common in residential settings.
- CA-B (Copper Azole – Type B) – This uses copper as an insecticide and fungicide, and azole co-biocide to ensure effectiveness on certain fungi that are resistant to copper treatments.
- CA-C (Copper Azole – Type C) – Used instead of other Copper Azole formulations to achieve performance requirements in specific settings. It’s main difference is in the concentration of the components it contains.
Each of the abbreviations is an identifier for the type of preservative present in the wood and can often be found on a fact sheet accompanying the wood. Along with the type of wood you’ve bought, the fact sheet also lists what preservatives, if any, have been used to treat the wood.
Check for Physical Changes
While a manufacturer’s label and fact sheets make spotting pressure-treated wood much simpler, they might sometimes be unavailable. This is particularly true if you’re recycling the wood yourself.
Thankfully, checking for physical changes can still be a good way to identify pressure treatment.
Adding preservatives to wood leaves multiple signs, which can vary slightly depending on what the wood has been treated with.
Color
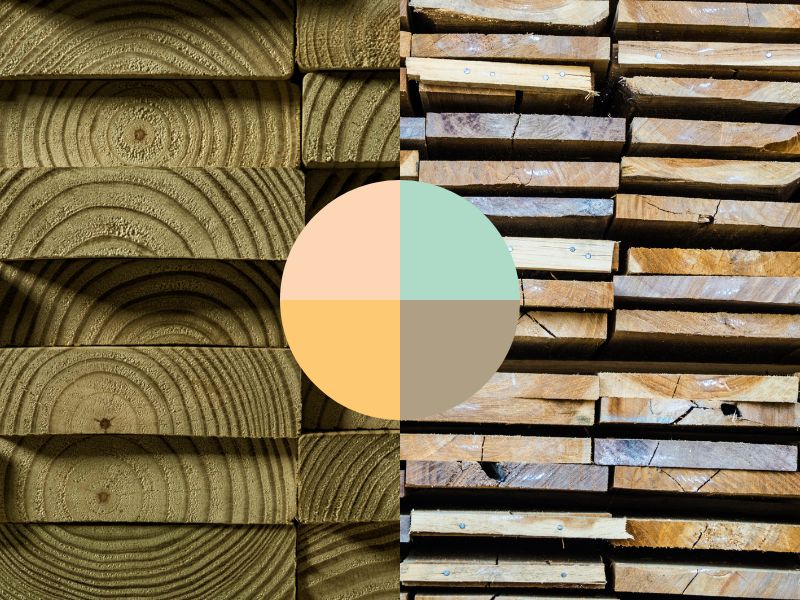
The clearest physical sign of pressure-treated wood is a color change. On finished furniture, this sometimes manifests as a colored patina on its surface.
Not all wood will have a patina, however, as it takes time to form. Since we’re dealing with reclaimed wood, which has often had plenty of time to develop a patina, it’s likely you can use this as a clue.
For wood without an easy-to-spot patina, another option is to cut into it to check its cross-section. Easier to do on lumber, but less so on finished furniture!
Pressure-treated lumber will have a grey band at the outer edges, which should slowly transition into a colored center.
The color change depends on the preservative used, but these are the most common possibilities:
- CCA – Light Green
- ACQ – Olive
- CA-B/CA-C – Brown
Smell

If your wood has been freshly pressure-treated within the last month or two, you’ll likely smell the leftover chemical on the wood. Of course, this only applies to freshly-treated wood, as the smell fades over time.
Depending on how the wood is handled and stored, this can take weeks or months.
Incisions
Pressure-treating wood requires a vacuum-sealed, pressurized chamber to essentially “push” the preservatives into the cellular structure of the wood. Even with this, sometimes mills make incisions at intervals along lumber to make it easier for the preservative to penetrate.
These incisions aren’t always present. While they might sometimes be used on softwood (like pine), they’re more common on hardwood like oak, as it’s much harder for the preservatives to penetrate due to the increased density.
So, if your lumber has incisions at intervals along its body, it has most likely been pressure-treated.
Lab Tests

If neither of the above methods works for you, or you need more certainty or precision, you’ll need to send a sample to a lab. This can be expensive, so it should only be used when necessary.
The main advantage of choosing this route is the certainty of the result. While physical properties and manufacturer stamps might not always be reliable or available, a lab test will tell you everything you need to know about the wood sample.
Alternatively, there are home tests you can try that are much cheaper. The trade-off is that they’re not as accurate as lab work. You can also only check for a much smaller variety of chemicals (most commonly arsenic).
If you’re interested in this, consider the Industrial Test Systems Quick 481396-W Arsenic Wood Field Testing Kit. These kits are quite easy to use and give you relatively quick results.
On a side note, some people recommend burning wood to find out if it’s pressure-treated, as it will burn with a colored flame. You should never burn any wood you suspect is pressure-treated. If the wood was treated with CCA, burning it will release arsenic from its bond. The resulting ash and smoke can cause severe health problems if ingested.
This is particularly important for reclaimed wood. Since it’s older, it’s much more likely to contain CCA.
Should Reclaimed Wood Be Pressure Treated?
While it can be important to know how to spot pressure treatment, it’s often more important to know whether you should go for pressure treatment in the first place.
Although pressure-treated wood will usually last longer and be more durable, it’s not suitable to use everywhere.
CCA, for example, has been severely restricted or banned in some jurisdictions due to its danger to human health. Other preservatives aren’t nearly as dangerous as CCA, but that doesn’t mean they’re completely safe, either.
A good rule of thumb is never to use pressure-treated wood furniture inside your home. For outdoor use, it’s generally fine for structures like sheds and fences. While I used pressure treated wood for my outside furniture, like benches and picnic tables, you might prefer to avoid it for your own patio furniture, especially if your climate is less damp.
How To Maintain Reclaimed Wood Furniture

Pressure treatment is a poor choice for most reclaimed wood furniture as it can be a health hazard. Here’s what you can do instead:
- Avoid heat: Heat from the bottom of plates and drinks can warp or mark reclaimed wood. Constant direct sunlight can also cause similar problems.
- Clean up any moisture quickly: Any spills left on reclaimed wood furniture will seep into it, potentially staining it and potentially damaging it structurally.
- Periodic maintenance: Regular cleaning can make a world of difference for reclaimed wood. A good clean with a soft rag and a suitable natural or factory-made cleaner will help to keep it looking good. A periodic fresh coat of varnish can also reseal the wood and help it regain its luster.
Conclusion – How Do You Know If Reclaimed Wood Is Pressure Treated Or Not?
Most reclaimed wood from reputable dealers will have an accompanying fact sheet and label telling you if it has been pressure-treated.
For reclaimed wood you’ve gathered yourself, you might need to check for incisions or a colored patina on its surface or cross-section.
The best way to determine pressure treatment is to send a sample of the wood to a lab, but that can be expensive.