How to Build a Cob Oven: The Ultimate Guide In 13 Easy Steps

Image courtesy of Tyrant Farms.
Have you ever wanted to make delicious pizzas fresh from the oven? Or maybe bake some tasty pastries and treats that bring family and friends together?
If so, you have three options — buy a regular electric oven, invest in a professional brick oven, or build a cob oven. If you choose the latter, you’ll have to learn how to build a cob oven unless you can find a tradesman willing to take on this small project.
In my experience, finding a professional willing to build a cob oven is difficult, which leaves the DIY option. Fortunately, a cob oven DIY project is relatively quick and easy.
A cob oven is an eco-friendly baking alternative that must meet two important conditions for efficiency. First, you must build it in a manner that ensures sufficient radiative heat back into the oven. Second, you need sufficient insulation around the oven to conserve the heat and keep it inside.
So, how do you build your cob oven to meet these conditions?
In this article, I’ll discuss how to build a cob oven to meet the above conditions. From cob oven materials to cob oven designs, this article is your go-to resource as you journey into the exciting world of cob ovens. Let’s get started!
Step 1: Gather the Necessary Materials
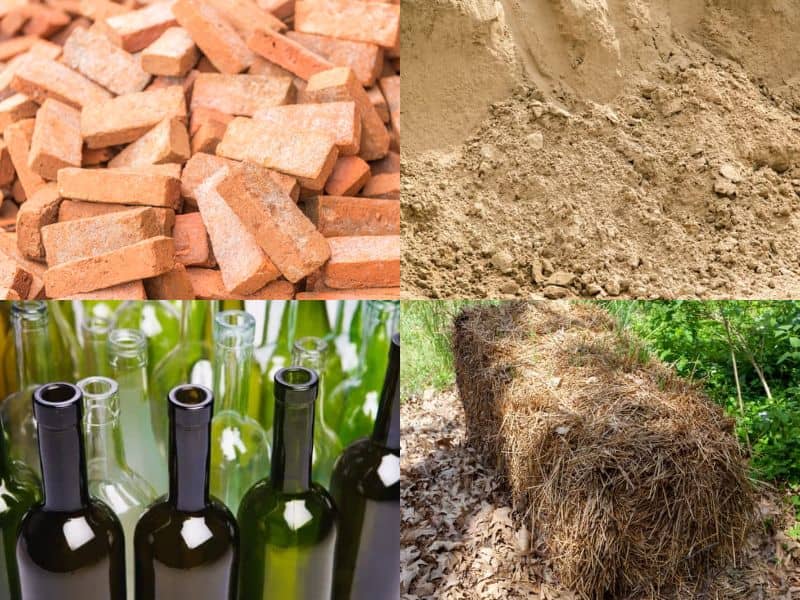
As with any construction project, you want to have the necessary materials before building. This way, you’ll have a seamless cob oven-building process without having to stop along the way to get anything.
The following are the necessary materials to build a cob oven:
- Storage heater bricks: They’re for building the plinth over which you’ll build the oven. The number of bricks will depend on your desired plinth height; the taller the plinth, the more bricks you’ll need.
- Concrete: For building the footer.
- A truck bed of quartzite: These will form the base of the oven’s foundation.
- Tarp: This is for making the cob mix. We shall use the tarp cob-making method.
- 60 empty wine bottles: These are for insulating the foundation to prevent heat loss into the plinth and the ground. They are arranged beneath the firebrick hearth.
- A truck bed of building Sand: For making the cob mix, a base for firebricks, and sand dome before adding the clay and, eventually, cob.
- Two large containers of clay: Part for insulation and part for making the cob mix.
- Medium to high-duty hard firebricks: They will form the oven’s floor.
- Four bales of straw: It strengthens the cob mix and adds insulation by trapping air in its hollow stems.
- Water: For mixing cob aggregates and making mortar.
- A tape measure: To measure the oven’s dimensions accurately.
- Mortar trowel: To spread and level the mortar mixture on the plinth.
- Gravel: For backfilling the foundation.
- Hardwood: At least 2 inches (5.08 cm) thick for the oven’s door.
- Jigsaw: For cutting the hardwood door to the appropriate size.
- 60 pounds of Mortar: To bond the storage heater bricks on top of the plinth.
Step 2: Choose an Appropriate Location for the Cob Oven
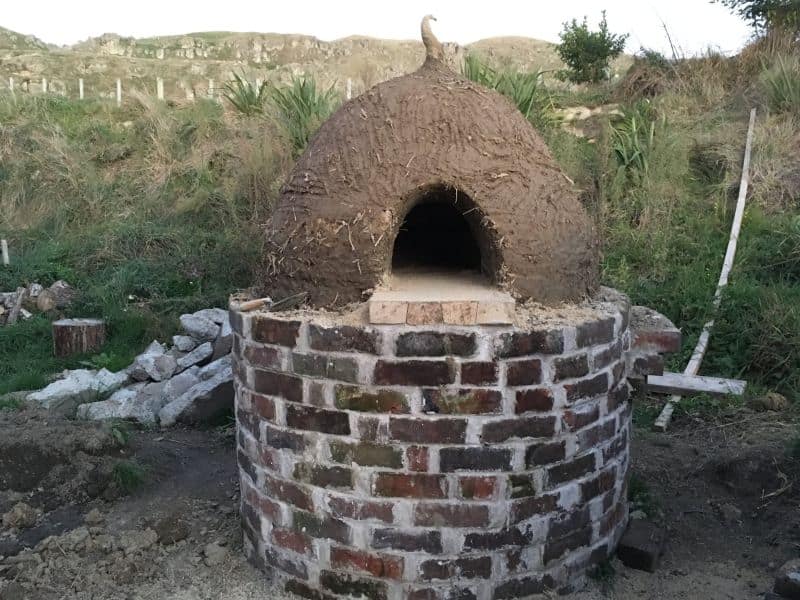
Your oven’s location must meet the following conditions:
- It should not be too close to your house or other combustible materials
- It must have enough space for the oven
- It must be open with a free flow of air to facilitate combustion
- It should be free of buried plumbing or electric wires
Most cob ovens are built in a backyard or garden, but you can also build one on an open rooftop if there’s enough space.
Step 3: Decide Your Cob Oven’s Dimensions
The size of the oven determines the foundation’s extent and the plinth’s diameter.
Ideally, the oven should accommodate your preferred type of bake.
A base diameter of 1.1 meters (43.32 inches) is enough for a cob oven to cook a pizza at a time. Therefore, you can build from this estimate based on what you want to bake.
As for the plinth’s height, a good rule of thumb is to build it high enough so you can easily tend to the fire without stooping down. Therefore, aim to have the top of the fire bricks at about waist height.
Specific dimensions for the oven include:
- Interior ceiling height: 75% of the oven’s interior floor diameter.
- Door height: Approximately 63% of the ceiling height.
Step 4: Dig a Drainage Trench
You want to drain rainwater from the cob oven to prevent water damage. Therefore, you must dig a drainage trench surrounding the foundation.
You’ll need a larger foundation for a 1.1-meter (43.31-inch) cob oven. You need 8 inches (20.32 cm) more for the cob dome, 16 inches (40.64 cm) for insulation, and 3 inches (7.62 cm) for plaster.
It’s recommended to dig the drainage trench past your local frost line if you want your cob oven to last more than 100 years. Otherwise, you can dig between 18 and 24 inches (45.72 and 60.96 cm) to deal with the issue of thaw/freeze damage.
Once the foundation trench is in place, backfill it with gravel for efficient drainage.
Step 5: Build the Plinth/Foundation
Now it’s time to build the solid base for your cob oven.
Start by laying 14-inch (35.56-cm) flat storage heater bricks on the plinth foundation and join them together with mortar. Use a trowel to smooth out the mortar in between each brick as you go.
Once all the bricks are laid to your desired height, fill up to 3/4 of the plinth’s interior with quartzite stones.
Arrange the wine bottles, closely packed together, on top of the quartzite stones for insulation. Once the bottles are embedded within the plinth, add a couple of inches of sand and smooth it to make a flat surface.
Your setup with wine bottles (before adding sand for a level surface) should now look like the one below:
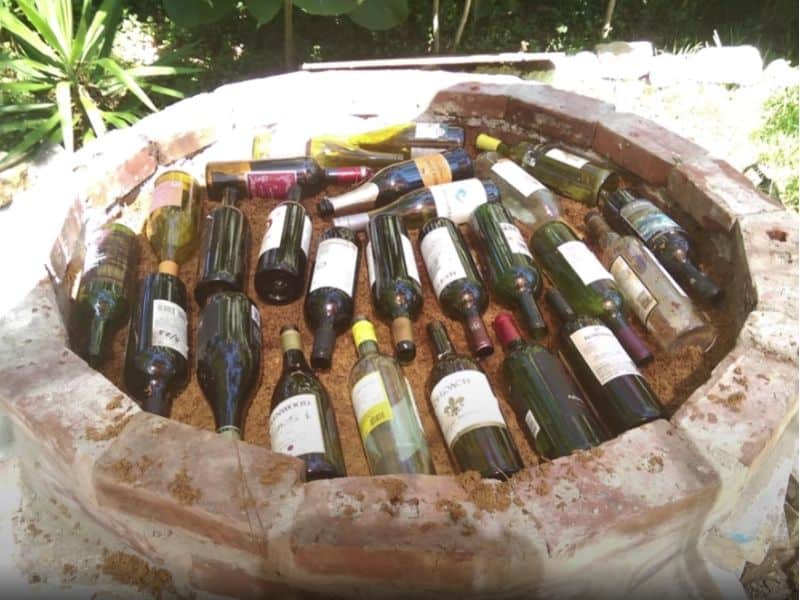
Leave the setup to form overnight.
Step 6: Build the Floor of the Oven
After leaving your plinth overnight, it’s time to build your cob oven’s floor.
Since cob ovens can get up to 700℃ (1,292℉), ensure the oven’s floor is fireproof and can withstand extremely high temperatures.
Moreover, the floor should not be made from materials like concrete pavers because they contain toxic chemicals that can react with heat and cause illnesses.
Medium to high-duty hard firebricks are suitable for use in a cob oven.
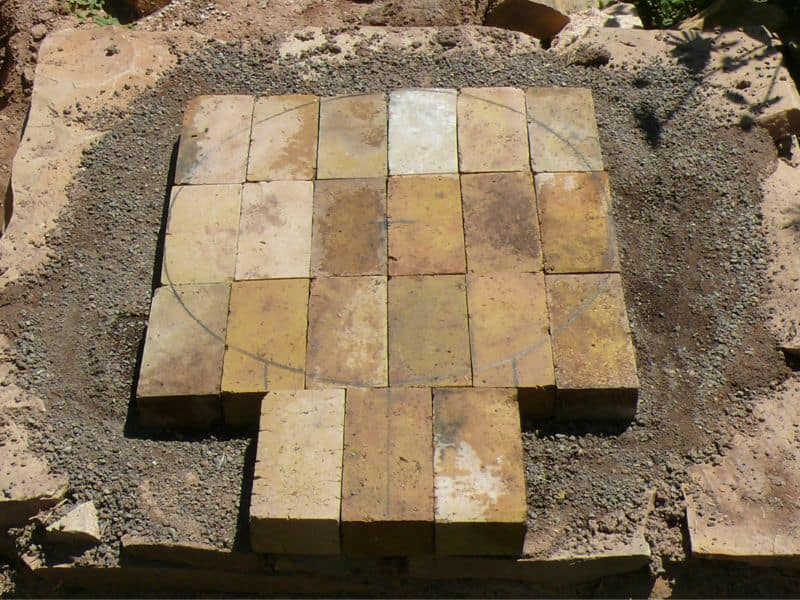
Arrange your fire bricks onto the leveled sand surface, placing them as close to each other as possible. This forms your oven’s cooking floor.
Using a tape measure and a pen, measure and mark an oval outline for the stove on top of the firebricks. The outline should incorporate the opening for the front, as shown below:
Step 7: Build a Sand Form (Dome) for the Oven
You need a sand form to build your cob oven around.
The best way to build the cob oven dome is by first making a sand mound that will be covered with the first layer of clay insulation. You’ll then pull the sand out once the clay dries to leave a hollow dome.
Here is the procedure for building the sand dome:
- Mix sand and water to achieve a consistency suitable for building a sandcastle.
- Locate the center of your outline by drawing a vertical and a horizontal line to form a cross. The meeting point of the cross is the center.
- Place a stick in the center and have a helper hold it.
- Start building the sand dome around the stick to cover the outline you created in step 6.
- Pile the sand until you attain a height of at least 75% of the oven’s interior floor diameter.
- Smooth out the dome using a trowel.
- Make a door by cutting a semi-circle shape out of the hardwood using a jigsaw. The door’s height must be 63% of the dome’s internal height. I’ll discuss fitting the door as we progress.
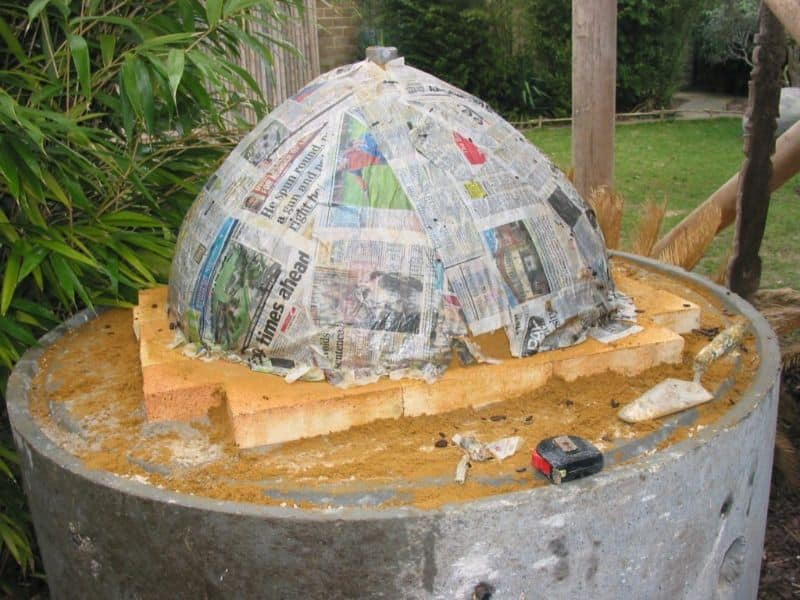
- Wet the dome’s surface with water and cover it with newspapers to prevent the sand from mixing with the first cob layer.
Your setup should now look like the one below:
Step 8: Mix and Apply the First Cob Layer
The purpose of the first cob layer is to serve as a thermal mass to radiate the heat back into the oven.
In our cob oven DIY guide, we recommend that this layer is made by mixing clay and sand in a 50/50 proportion. No straw is added to this mix. Here is how to do that:
- Mix clay and sand on a tarp in a 50/50 ratio.
- Add water to the mix bit by bit while trampling until you attain a dough-like consistency. The ideal moisture content for cob is between 15%-35%.
- Using your hands, mold the mix into golf ball-sized clumps and drop them onto the tarp. Make sure to form enough clumps for the entire sand dome surface.
- Once enough clumps are lined up, it’s time to apply them onto the sand dome. Start from the bottom and build upwards, creating a 3-inch (7.62 cm) layer over the sand form. Make sure no gaps are left between each cob clump, as this will lead to material shrinkage and cracks.
- Smooth the cob surface with a trowel to create an even layer.
Step 9: Create the Doorway
You’ll remember we made our door from hardwood but never fitted it; it’s now time to fit it.
You need to create a doorway before the first cob layer dries. To do that, place the door with its bottom resting against the cob and the firebrick cooking surface.
Using the door as a template, cut around it with a spade or trowel to reveal the sand dome. Check that the door fits snugly in the space for easy placement and removal.
Using a trowel and your hands, smoothen out the doorway’s edges and ensure no cob clumps are left in the door frame.
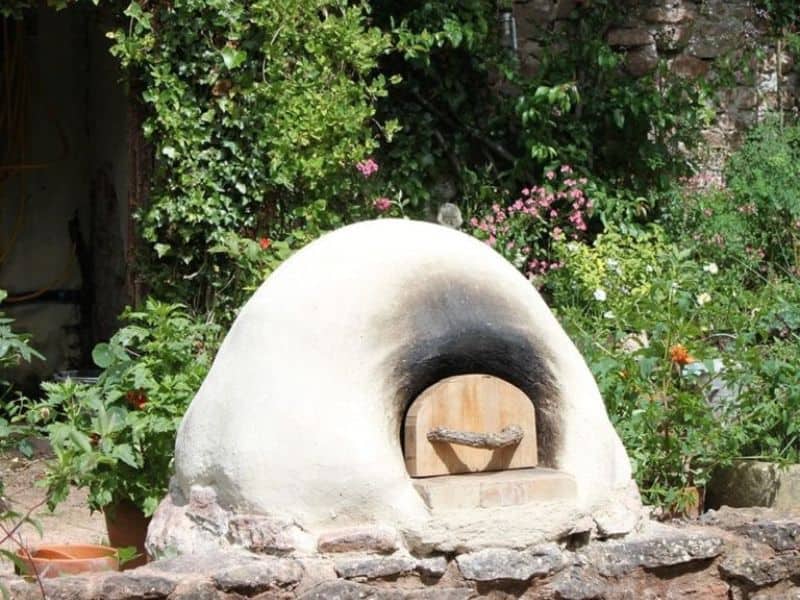
Leave the first layer of cob to dry, which could take a while, depending on the humidity levels in your area.
Now your oven should look like the one below:
Step 10: Mix and Apply the Second Cob Layer
This second cob layer is for insulation. It’s responsible for conserving and keeping the heat inside the oven.
This layer comprises clay, sand, straw, and water. If you’re not using a pre-made mixture, you should start by mixing the dry ingredients (clay and sand) on a tarp.
The ideal proportion of clay to sand is 5 to 7. Once you have this mixture, add one part straw to every four parts of the mixture.
Add water bit by bit while trampling until you attain a consistency that can be molded.
Mold the cob mix into clumps and drop them onto a tarp spread over the floor.
Once you have enough clumps, it’s time to apply them to the first layer of cob. Start from the bottom and build upwards, creating a 4-inch (10 cm) thick layer (do not cover the door while adding this second layer). Ensure no gaps are left between the clumps.
Smooth out the cob surface with a trowel to create an even layer. Push any straw indentations into the clay wall with your fingers for a smooth surface and score them slightly with a trowel.
Leave this layer of cob to dry for a week or more, based on the humidity levels in your area.
Step 11: Add the Final Layer of Plaster
According to the cob oven plans pdf, a final layer of plaster is necessary to waterproof your cob oven.
A lime-based plaster is suitable because it’s waterproof yet permeable.
Although earthen plasters are breathable, their only downside is that they are not waterproof. Therefore, remember to keep your oven covered when not in use if you opt for an earthen plaster.
Step 12: Remove the Door and the Sand
Once everything has dried, you can remove the door and the sand form. Pull out the sand form from the doorway to reveal your cob oven.
Remove excess clay or straw from the oven’s surface using a trowel and broom.
Step 13: Fire the Cob Oven
The cob oven needs to be fired to dry it completely.
Create a fire inside the oven using dry kindling and wood. Once the fire is lit, leave it to burn for at least six hours.
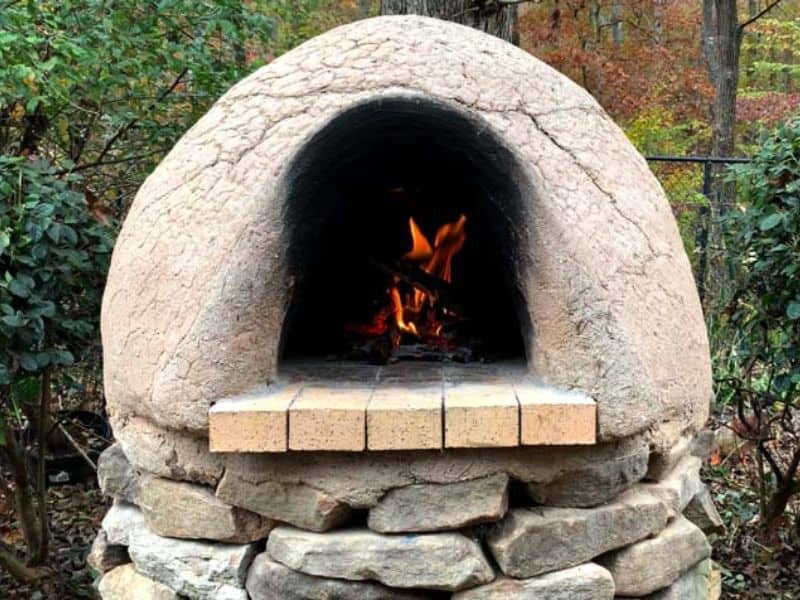
When you see smoke coming out of the doorway, it’s time to increase the intensity of the fire by adding more wood.
Your cob oven should now resemble the one below:
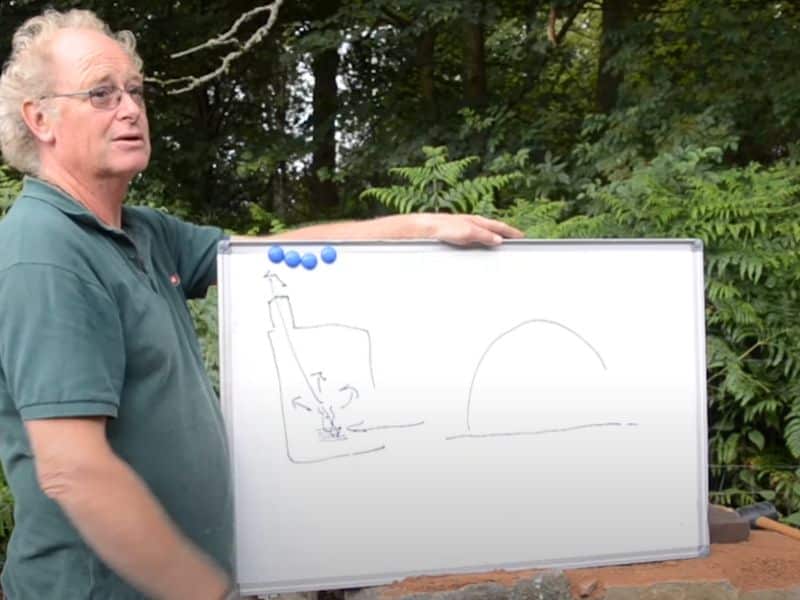
Here is a video summarizing the cob oven-making process:
Final Thoughts
Although building a cob oven requires time, patience, and dedication, the right cob oven instructions makes the entire process easy and enjoyable.
Whichever cob oven design you settle on, remember to add a layer of plaster for waterproofing. You don’t want your hard work to go to waste and be damaged by rain.
Before you leave, check out this guide for using a reclaimed wood mantel for your fireplace.


